Using ST32F4 series MCU as a loudspeaker processor

STM32F4

There's a lot of information out there on using MCU's like arduino or more upscale M4 arm-cortex chips like those manufactured by STM as a process controller.
Measuring stuff // Controlling stuff.
Just google STM32F4 and you will find all kind of howto's on how to manage i2c or spi data streams.

We as audio engineers being only interested in i2s are not that lucky.
Don't get confused by i2c versus i2s!
Also there is references for i2c and AD/DA but this will be about analog sensor data. Not Audio!

So, as a future reference, I am going to describe the long and arduous task of getting these things to process audio.
This is not going to be a step by step tutorial: you will need different places to get the required knowledge, but hopefully it will be of use for someone stumbling across.
Bare in mind that the whole process took me about 4 months....


First steps

These are microcontrollers. So they are not running an OS like a raspberry PI. They are also not DSP's, so you can't program them with some third-generation language  like SigmaStudio.
Think bare-metal programming..Think C..
So first thing to do: get some knowledge about (embedded) C coding. Make your first program. The mcu equivalent of 'Hello World' will be a blinking LED.
You could write your code in a text editor, but that will be really die-hard-old-skool. 
Nowadays one uses Integrated Development Environments like a helping hand .
Now do spend some time to pick an IDE that will serve the purpose!
There's quite some free stuff out there, check Platformio or Eclipse based applications.
One warning: these are all community supported and as there isn't a huge audio community active on these platforms you could find that not useful at all!
After unsuccessful trying everything on both Windows and Linux, I finally decide to use a commercial product:
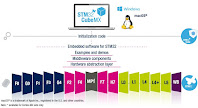

That could cost you some substantial cash, but there is a limited demo version that might just be enough for your purpose.


STM32F4 loudspeaker processing part 2

Second step

So you got that blinking light, maybe you did some stuff with on board sensors or an external control. Nice!
By this time you must have stumbled across the 'library' thing.

At this date I still do not understand the engineering/design philosophy behind the library concept:
Not structured. Not documented. No rules. Not standardized.
And as such a big cause of bugs and conceptual problems.(not only caused by yourself!)

Still you will need them: standing on the shoulders of others.

This alone took one month trial and error to get a working configuration going.
As I am using STM32 microcontrollers I use the HAL (hardware abstraction layer) libraries provided by STM.
More specifically: as these are generated by CubeMX

Next step is to get effluent in using CubeMX to generate the projects base code, then open/import this project in KEIL MdK to add your user code. Maybe get some knowledge about the build in debugging tools. These won't help you a lot in processing audio though, so don't waste to much time there..


Third step

Be brave and connect your first audio board DAC to your MCU board. Maybe you all ready have a DAC on your discovery board as with a STM32F4DISC board.

Now start to understand what is needed to stream i2s data to your DAC. Dig through all those data sheets to learn and find details about the several i2s protocols and how to configure both DAC and MCU. Don't despair! Just familiarize yourself with the keywords and trust the work others have done for you (at least at first).
Apart from the different protocols (use Philips!), the most important concept is: clock signals. To make things more confusing different names are used:

MCK  = CK = master clock
WS = LRCK = word select or LR clock
BCK = SCK = bit clock or serial clock

As audio freaks we do understand sample frequency and bit depth, and how they work out on the different clocks, don't we?
Now generate a sine-wave in code or use some table or whatever and see if you get a peep without cracks and or distortion. If you do consider yourselves lucky and talented. If not learn more about data formats! There is also some good youtube videos by Mutex if you get stuck.
Remember: this is bare metal coding so you have to control everything!
Again 1 more month of struggling: i2s audio data is a signed integer between -1 and 1 (times bithdepth -1) aka two's complement
You will have to control the data format all the time, casting stuff like:

 txBuf =(uint16_t)data_out //filling send buffer with 'typecasted' correct data//

And also be aware of overflow! You can't just multiply or divide your data.
These are helpful:

data_out>>1 //data halved as in 6 dB down in volume//

And hey, here's interesting stuff: ever participated in the floating point versus fixed point debate of audio processing ?? hmmm..


next to part 3

Powered Loudspeakers + DSP...


Why powered speakers?

Obviously, most loudspeaker boxes will contain individual drivers for maybe high, low, mid frequencies.
So we must provide a way to separate those frequencies.
Commonly this is done with 'passive' components (i.e. inductor / capacitor networks). I could write a post on that one day.
But for more control and that precious phase/time alignment, you will need some DSP.
In pro-audio this traditionally has lead to 19'amp racks filled with amps and  some DSP (maybe like one off those Soundwebs).
Anyway, things get rather bulky fast. So if you need just 1 (euhm, mostly 2 as in stereo) boxes, maybe as a fill-in or delay or just some soundscape thingie, something compact would be nice.
Hence the popularity of 'powered' boxes.

Now for the difficult part:

Most of  the powered loudspeakers in the market are not of a quality level we do appreciate, those plastic boxes will serve a purpose, but not ours...
So here's the design goal: make a powered box with a build in DSP//amplifier (no user controls!)
So first we checked the market to find a ready made 'plate-amp' to fit into our loudspeakers. People into this know the brands,yup I tested them all and I will not state my opinion on either off them .. :)
The main problem is that they are either limited in DSP (no FIR) or highly suffering from unstable software due to featurites.
So phase 1:

Build a DSP unit:

There you go, home brewn DSP with a Sharc SigmaStudio ADAU1701.
Check the mix of through hole audiophile components (WIMA, panasonic) and smd stuff (man, soldering these manually..aaarggh..)

Nothing really new here hardware wise, everybody knows those MiniDSP boards, but this one is programmed with the free Sigma Studio software, so we can do stuff like FIR.

Problem solved?

Hmmm, not really: apparently it is difficult to mix analog and digital circuitry. And those on board ADC's are not the most brilliant.
I did some test with SPdif and i2s inputs, which did improve the sonic quality, but things get complicated fast.

We could use some different DSP with a dedicated AD/DA section, but you will quickly find that the choice off self-boot chips is limited. All the rest will need some MCU to boot and control.
And hey, here's an idea:

Why not use a MCU  (you know like a arduino) to do all processing?
There is a zillion off boards available out there and they are all dead-cheap!

One tiny problem: not that many people are doing audio stuff with them, google doesn't really help

So stay tuned to find out more...